You’ve created a Nerd profile, and now you’re ready to start finding cloud-driven projects. In this guide, we’ll walk you through the basics of Nerdly, showing you how to navigate the platform, find opportunities, manage your settings, and get paid. Let’s get started!
The Home screen
After logging in, you’ll be taken to the Home screen. This is your personal dashboard where you can view engagements, (h)opportunities, services, interviews, and recent transactions. You can also edit your profile and get help from Sheldon or chat with a contact.
Finding (h)opportunities
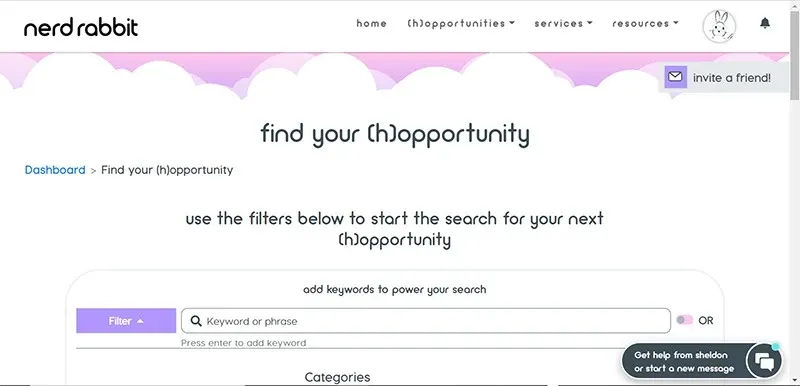
When you’re ready to find a (h)opportunity, click “(h)opportunities” from the navigation menu and select “find your (h)opportunity.” A (h)opportunity is what we call a job posting created by a NerdHerder—that is, someone looking to hire.
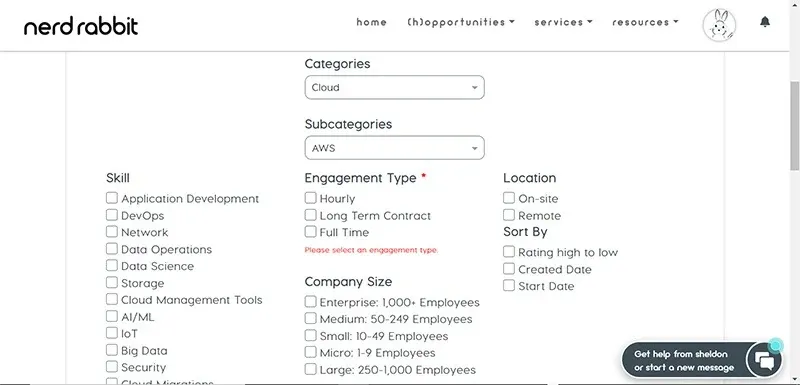
Choose a category, subcategory, and engagement type. Optionally, you can add a keyword or phrase and refine your search by:
- Skills
- Company size
- Location
- Salary or hourly rate estimate
When you’re ready, click “Search” to view all (h)opportunities that match your criteria. You can also save your category for quicker results in the future.
Open (h)opportunities will appear in a list below the search box. Express your interest by clicking “Apply” in the upper right corner. Next, you’ll be asked to enter your desired rate, hours, and add any comments you might have.
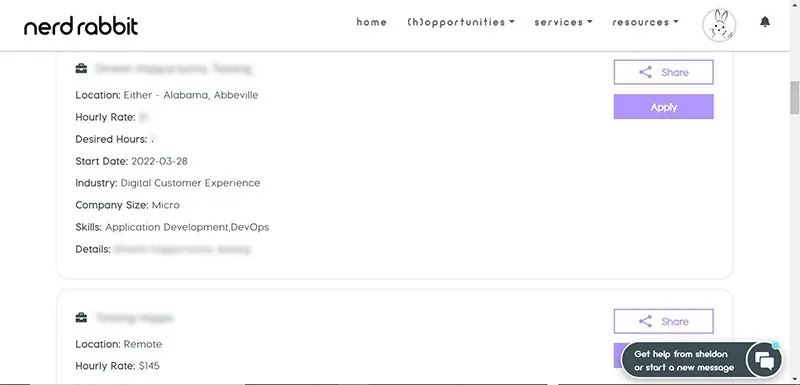
After you apply, the NerdHerder who posted the (h)opportunity will get a notification. Nerdly aims to reduce hiring bias, so the NerdHerder won’t be able to see any personally identifiable information about you until you’re in an interview or until after you get the job.
Managing (h)opportunities
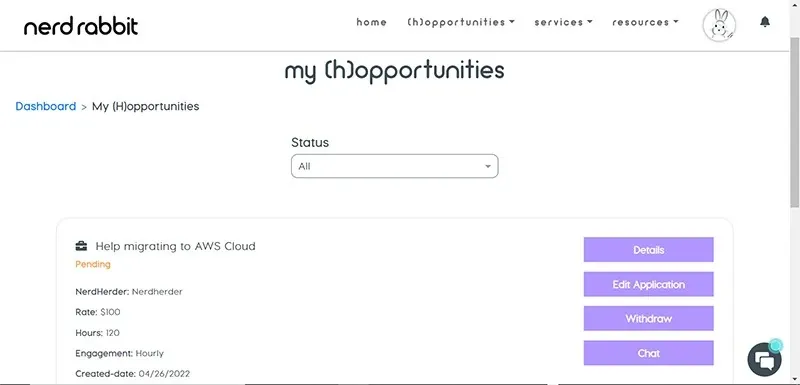
After you submit an application, you can see a list of all the (h)opportunities you’ve applied for by clicking “(h)opportunities” and “my (h)opportunities” from the navigation menu.
The NerdHerder may want to schedule an interview before hiring you, in which case you’ll get a notification with the date and time. If at any time you want to make changes to your notification settings, you can do so by clicking the rabbit icon in the top right corner of the screen, then clicking “Settings” and “Notification Settings.”
Once you’ve accepted the interview, it will appear in the “interviews” panel of the Home screen. Just as the NerdHerder won’t see your name when you apply, you won’t be able to see the company name until you’re in the interview or until after you’ve been hired. Note that anonymity also goes away for both parties when someone accepts a chat request.
Nerdly comes with a built-in video chat tool, so you don’t have to worry about tracking down a Zoom link before your interview. Click “Join” from the Interviews panel of the Home screen, or click on the notification and then “Attend meeting” from your interviews list.
If the interview goes well and the NerdHerder decides to hire you, you’ll get an offer notification in Nerdly. Enter your desired pay to negotiate a rate. Once you and the NerdHerder come to an agreement, your (h)opportunity will be converted to an Engagement, which you can see from the Home screen.
Getting paid
Once you’ve started working, it’s time to get paid! But first, you’ll need to set up your billing so we know where to send your money.
Adding billing info
To update your billing settings, click the rabbit profile icon in the upper right hand corner of the user interface. Under the Accounts tab, click either the plus icon to the right, or the box below that says “Add Account.” Doing so will open a new tab to Stripe, our secure payments partner, where you’ll be asked to fill out your payment information. When you’re done, head back to Nerdly.
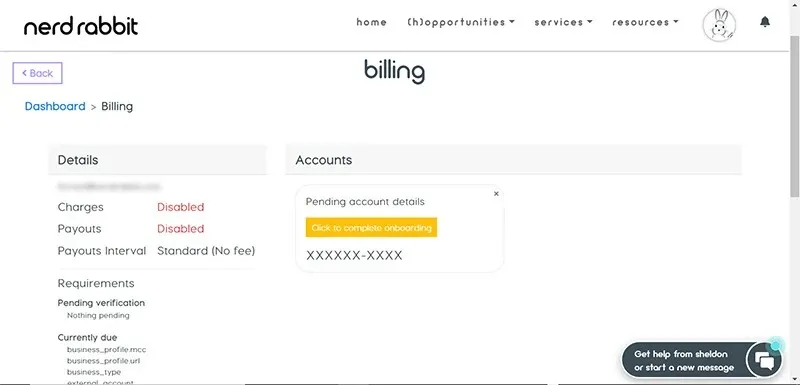
Now you should see your account listed on the Billing screen with a button that says “Enabled.” If you need to change your Stripe settings down the road, click on this button to visit your Nerdly Stripe account.
Submitting a timesheet
To get paid for your work, you need to submit a timesheet to your client. Navigate to the Home screen and click Engagements. Find the Engagement you want to submit a timesheet for and click the “Timesheet” button on the right.
Here you can see a list of all the hours you’ve billed for an Engagement with details like the date you submitted a timesheet, the hours billed, an optional description, the status, and any actions you might need to take. Click the “Add Timesheet” button below the name of your Engagement, and enter the information for your billable hours. When you’re done, click “Save” to submit your timesheet.
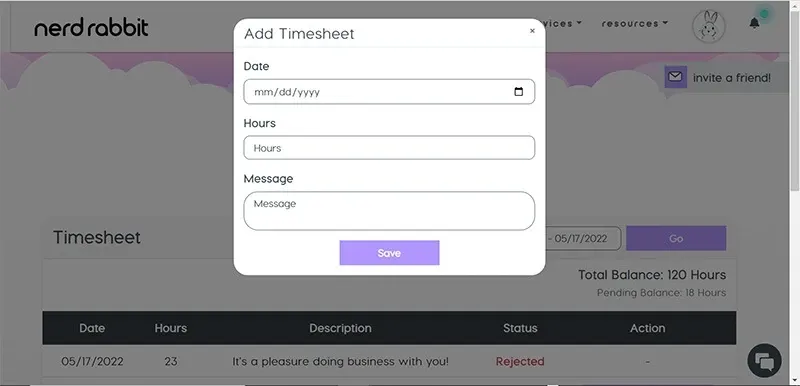
After you submit your timesheet, we’ll email the NerdHerder to let them know they need to log in to their account to approve the hours. If they don’t approve your timesheet within 24 hours, we’ll deem your timesheet approved and begin processing payment. Most payments will appear in your bank account within three business days.
In this example we’re looking at an hourly Engagement, but you’ll follow the same process for long term contracts as well.
Hop to it!
Now that you know how to find work and get paid on Nerdly, you’re ready to get started. Be sure to check out our other resources for getting the most out of Nerdly on our YouTube channel and blog. If you still have questions, check out our Nerd FAQs page for answers to some common questions.
